Making pretty note boxes
A div tip for all occasions
By Desirée De Leon in bookdown R Rmd
August 25, 2019
\
My summer intern project with Alison Hill was a bookdown book called rstudio4edu (coming soon!), and for this project we wanted to create custom, pretty tip boxes (aka custom blocks, sidebars, or –as I like to call them– “div tips”) to use in the book we were writing. We also wanted to include them in a series of site templates geared towards educators (also coming soon!), using R Markdown, bookdown, etc. The experience of creating my own div tips is what motivated this post!
Here’s an example of a div tip. I will show you how to make this.

Here’s another:
:::note This is a div tip that I customized specifically for this blog. :::
Under the hood, Part I
These are
Pandoc style custom divs, so they will work with any R Markdown flavored doc that uses Pandoc. This means any R markdown document, site, bookdown book, Distill site, and blogdown .Rmd post is fair game– but div tips will not work for xaringan or blogdown .md or .Rmarkdown posts.^[For the curious reader, check out Figures 2 & 3 of Emi Tanaka’s
blog post for a visual of how Pandoc comes into the framework for Distill (formerly Radix) and blogdown .Rmd posts, but not blogdown .md or .Rmarkdown posts.]
Bookdown has some div tips that are built-in, but there’s a good chance the built-in styles may not jive with your site’s aesthetic. I learned that these could be customized from Alison, who learned about it from the R Packages book ^[You can see the custom divs being implemented in the R Packages book’s commit history].
Why use div tips?
You can interject different versions of these little buddies throughout your site to point out notes, common mistakes, workflow shortcuts, or critical thinking questions for your reader (just to name a few ideas).
This makes your content more user-friendly, and as an added bonus, using div tips gives you another opportunity to add more color and personalization to your site.
And now it’s time for me to walk you through some CSS so that you too can make your own pretty div tips!
Making your own
What you need:
- CSS
- To link up your CSS file with your YAML
- Some small icon files to use for each different kind of div tip you want to make.
Let’s make some!
Infrastructure
First we make a CSS file and link it up to our YAML. I’ll show you how to do this whether you’re working in an R Markdown doc/site, Distill article/site, bookdown, or an .Rmd blogdown post (like this very post) as your output.
- If you don’t already have one, create a CSS file by going to File > New File > Text File.
- Name this file
style.css(you can choose a different name) and save it in your project directory. - Link your CSS file in your YAML (detailed below)
\
For R Markdown or Distill
If you’re working in an R Markdown or a Distill site, then you’ll want to open the file _site.yml and add the following as part of your output.
(Or, if you’re not making a site and are instead working with an individual
R Markdown document,
Distill article, or
single document à la bookdown, then you’d add this to the YAML frontmatter of your doc instead, substituting html_document for the appropriate output if you’re creating a distill::distill_article: or a bookdown::html_document2.
output:
  html_document:
    css: style.css
\
For a bookdown in the Gitbook style
If you’re working in bookdown, do this by making sure your _output.yml has this:
output:
  bookdown::gitbook:
    css: style.css
For blogdown, using the Hugo Academic theme
If you’re creating an .Rmd post within blogdown’s Hugo Academic theme, then you’ll follow the directions
here to add your own style.css file (note that the example in the link above names their CSS file “custom.css”, and you can do that too, if you want).
Okay, now that we’ve got that setup out of the way, we can start thinking about what to put in our CSS file to style our div tips.
Anatomy of a div tip

Here’s a visual overview of the things that the CSS below specifies. But the only properties you really need to think about changing for quick customization are the ones below. You can choose these ahead of time.
background-color:You can use the hexcode color value for any background color that your heart desires.color:^ Sames goes for the color of the text in your div tip.border:Of course, you don’t have to choose a border, but there are some fun options to play with. Thickness and color are self-explanatory, but you may not know about being to choose the border’s style (see options here, e.g.dotted,dashed,double, or if you’re feeling wild, useborder-left:,border-right:, etc. to give different sides different styles).background-image, which we’ll add in a minute.
Adding CSS styles
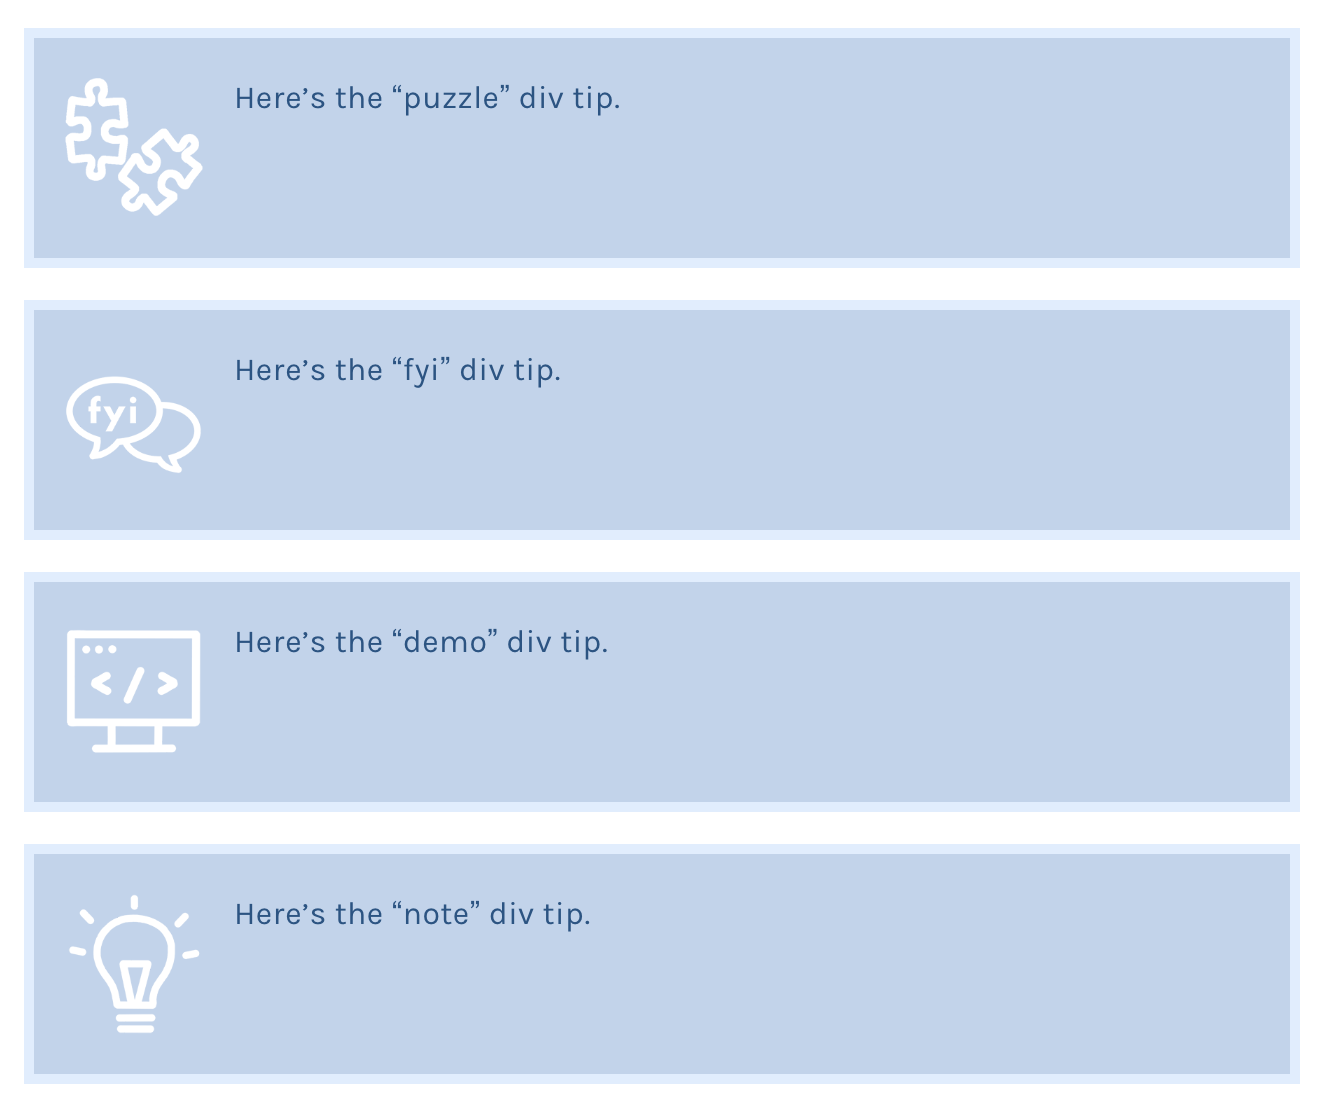
Let’s create 4 div tips: a puzzle one, an FYI/background info one, one to use as a placeholder for a live-coding demo, and one for general tips.
Open up
style.cssand paste the the CSS below into the file.Paste the CSS below into this file.
/* -----------div tips------------- */

  div.puzzle, div.fyi, div.demo, div.note {
    padding: 1em;
    margin: 1em 0;
    padding-left: 100px;
    background-size: 70px;
    background-repeat: no-repeat;
    background-position: 15px center;
    min-height: 120px;
    color: #1f5386;
    background-color: #bed3ec;
    border: solid 5px #dfedff;
  }
Optionally, give each div tip a different name by changing the word after
div.. You’ll have to use this name later as you make content, so go with something short and sweet.Change the CSS property values for
background-color:,color:, andborder:to suit your preferences. All four div tips will have these features.- Though we don’t cover it here, you could also consider giving your div tips a different font than the rest of your site by
choosing a Google font and specifying the
font-family:property in the CSS above.
- Though we don’t cover it here, you could also consider giving your div tips a different font than the rest of your site by
choosing a Google font and specifying the
Add div tip icons
I like to choose a different background image for each div tip, so I create a new style rule for each div tip so that I can give each one its own icon.
Pick an image for each of your div tips.
Save the images in your project directory.
Open
style.css.Paste the style rules below into your CSS.
div.puzzle {
  background-image: url("Your-turn.png");
}

div.fyi {
 background-image: url("fyi.png");
}

div.demo {
  background-image: url("Live-code.png");
}

div.note {
  background-image: url("lightbulb.png");
}
Change the file path within the
url()field for each div tip style so that it points to the image that you want to use.
:::fyi
File paths: Don’t be thrown off by the url() bit— you can put a regular, local filepath in here that points to your image’s location relative to where your CSS file lives. My your example code above assumes that your images are located in the same folder as your CSS file. But if your icons are in a different folder, you’ll need to account for that in your file path. If this is new to you, then
this site has a good example of how to navigate.
:::
:::note Blogdown weirdness: The Hugo academic theme will compile your files in a way that doesn’t necessarily reflect the way you’ve organized your directories. So, using the filepath tips above aren’t as straightforward. I found that if you follow stuff it should work:
Place your image icon files in the
static/folder of your project directory.Make sure your CSS file is in
assets/css/.Use a filepath like
"../my-image.png". For example:div.puzzle { background-image: url("../Your-turn.png"); }
:::
Use your div tips
Using div tips in your site, blog, or book is simple. Start off with three colons ::: followed by the name that you gave each div tip, and then close it off with another set of three colons :::. Like this:
:::puzzle
My content goes in here!
:::
Here are the four div tips we made:
Under the hood, Part II
What’s actually happening here is that
Pandoc will take the ::: and turn them into <div> tags with the names as classes:
So that this:
:::puzzle
My content goes in here!
:::
becomes this in HTML output:
<div class="puzzle">
My content goes in here!
</div>
The End
Now you’re fully equipped to start div-tippin'. Have fun creating content, and if you make a custom div tip that you’re proud of–let me know on twitter @dcossyle!
\